Installing, updating, and uninstalling the add-in
This topic describes how to install, update, and uninstall the Arria for Excel add-in. See also: Performance and systems requirements.
Important
|
Installing Arria for Excel
For security reasons, many organizations prevent individuals from downloading Office add-ins directly from Microsoft AppSource. Instead, approved Office add-ins are installed centrally in the Microsoft 365 admin center by a systems administrator, then deployed to one or more individuals or to the entire organization.
If your organization centrally manages your Office add-in installations from the Microsoft 365 admin center, follow these instructions:
If you manage Office add-in installations yourself and install them directly from Microsoft AppSource, follow these instructions:
If the options above are unavailable and you are evaluating the add-in, follow these instructions:
Note
To use Arria for Excel, you must have an Arria account with an Arria for Excel Enterprise or Arria NLG Studio subscription.
See Arria accounts and subscription plans for more details and to get started with a free trial.
Admin Managed installations
Follow these instructions if your organization centrally manages your Office add-in installations from the Microsoft 365 admin center.
First, check your Excel ribbon's Home tab. If you can see the ARRIA NLG button, the add-in is already deployed and no action is required.
 |
If you cannot see the ARRIA NLG button, do the following:
In the Home tab, click Insert > Get Add-ins (Excel for Desktop) or Insert > Office Add-ins (Excel Online).
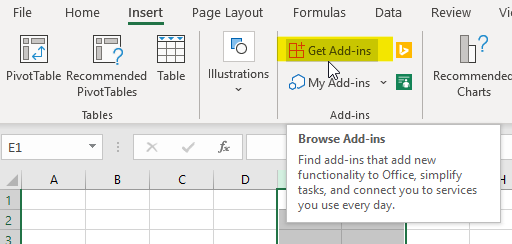
Excel for Desktop
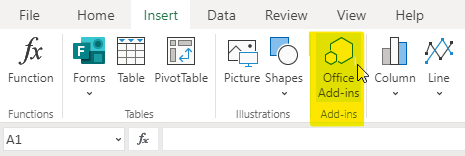
Excel Online
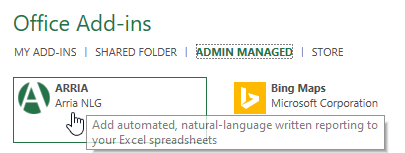
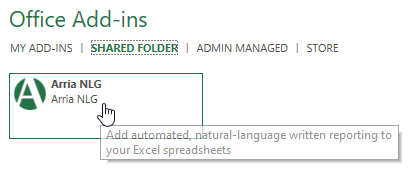
You see a window with one or more of the following tabs:

Click Admin Managed.
You see the Arria add-in.
Select the add-in and click Add.
The ARRIA NLG button now appears in your Excel ribbon.
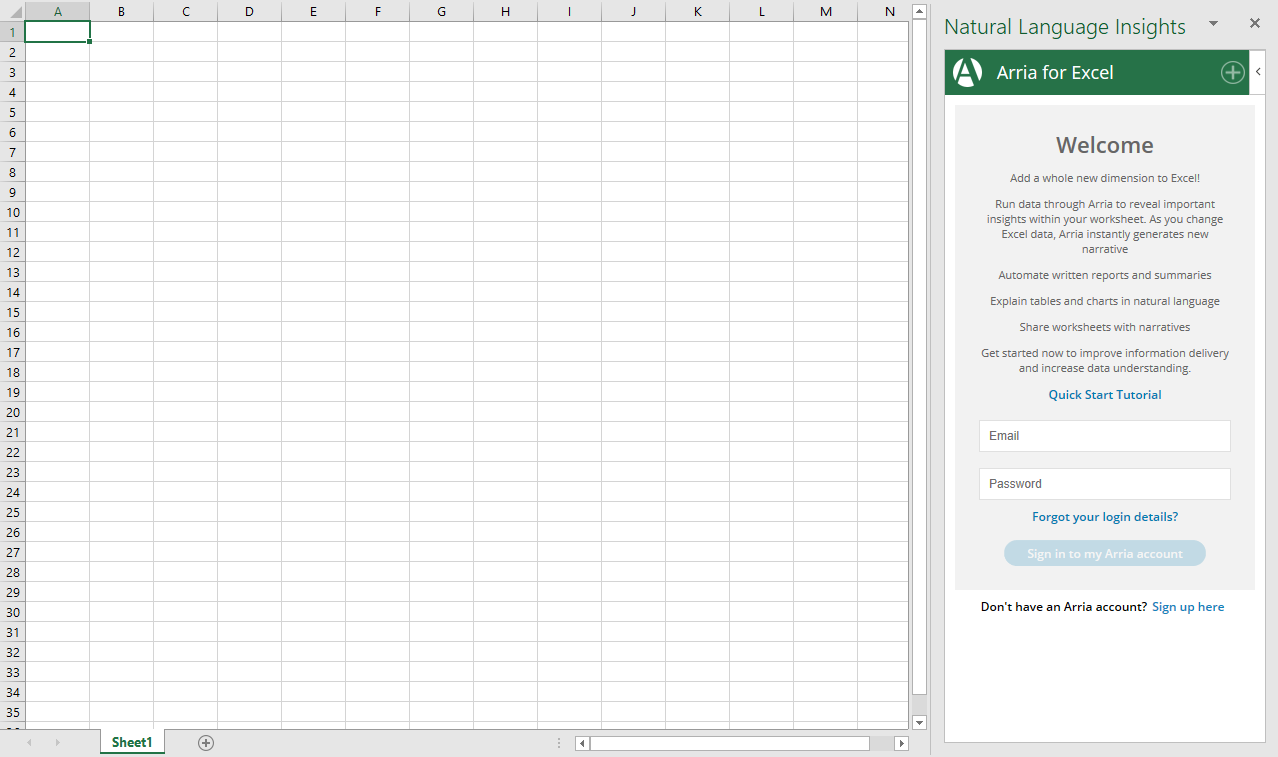
Click the ARRIA NLG button to bring the add-in into any workbook and get started with Arria for Excel by signing into your Arria account.
 |
NoteA note for systems administratorsSee the Microsoft documentation for instructions on how to deploy the add-in to one or more users in your organization from the Microsoft 365 admin center. We strongly recommend installing with the I want to add an Add-in from the Office Store option. |
AppSource store installations
Follow these instructions if you manage Office add-in installations yourself and install them directly from Microsoft AppSource.
There are two ways to install Arria for Excel directly from Microsoft AppSource:
from the Office Add-ins Store within Excel
(Home > Insert > Get Add-ins > Store)
Important
We strongly recommend installing from the Microsoft AppSource web store.
Install from the Microsoft AppSource web store
Note
If your organization has configured your Office 365 settings to prevent individuals from acquiring Office add-ins directly from Microsoft, you cannot install Arria for Excel in this way. Any attempt to do so produces this message:
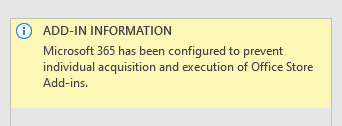 Installing from the Microsoft AppSource web store |
Your organization may instead make the add-in automatically available as described in Installations managed by organizations. Contact your systems administrator for more information.
For evaluation purposes only, systems administrators and those with similar expertise can download the Arria for Excel manifest file and sideload the add-in.
To get and install Arria for Excel from the Microsoft AppSource web store:
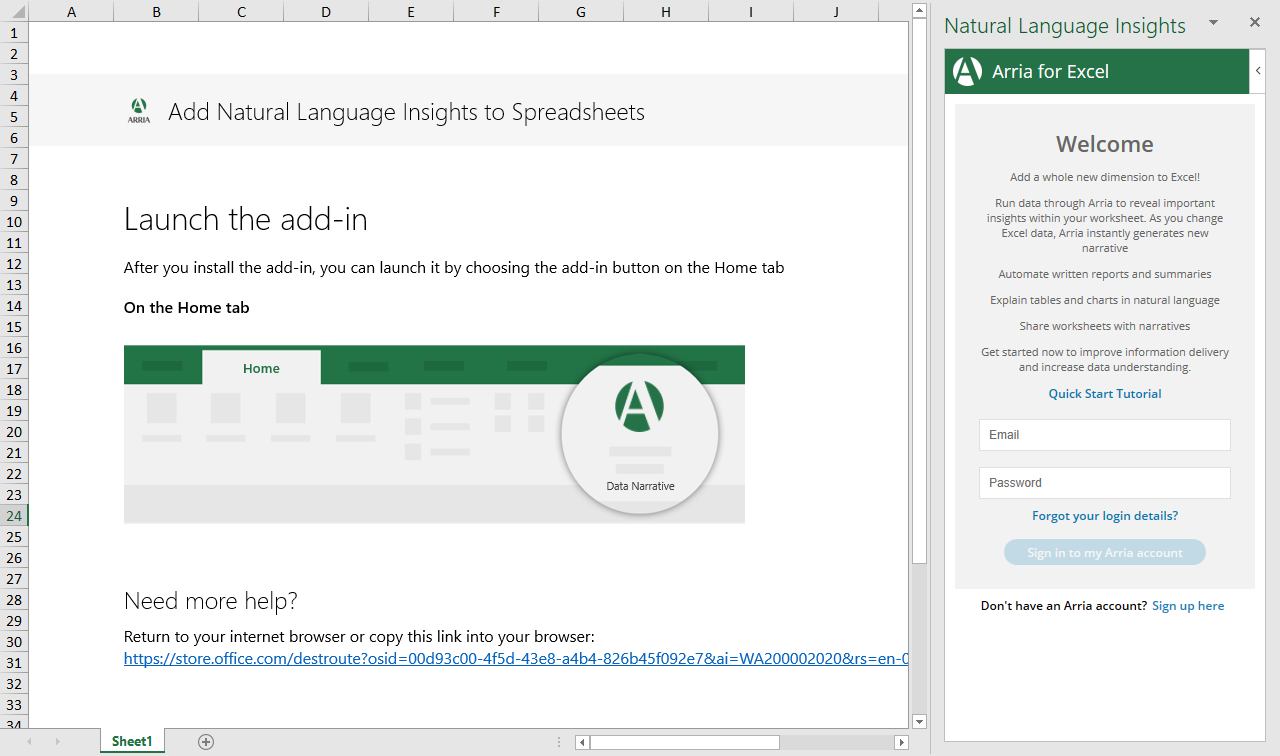
Go to the Add Natural Language Insights to Spreadsheets page on AppSource.
Click Get it now.

If you are not already signed in to an Office 365 account you will be prompted to do so.
Give Microsoft permission to use or share your Office 365 account information, if prompted.
Click Open in Excel.
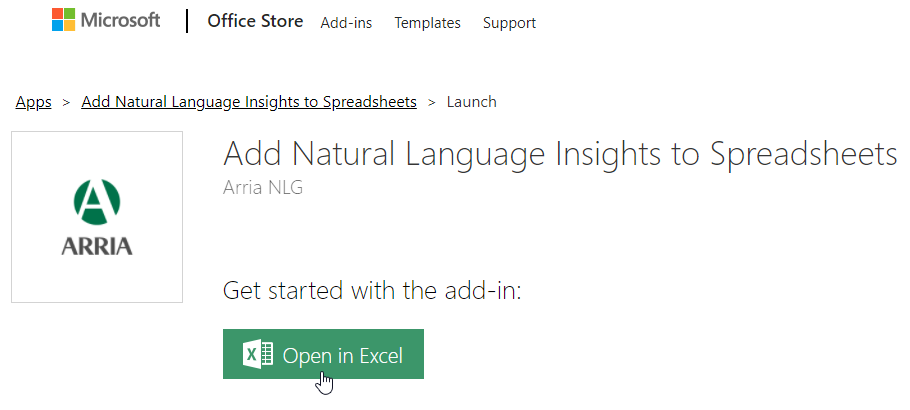
Give Microsoft permission to open Excel, if prompted.
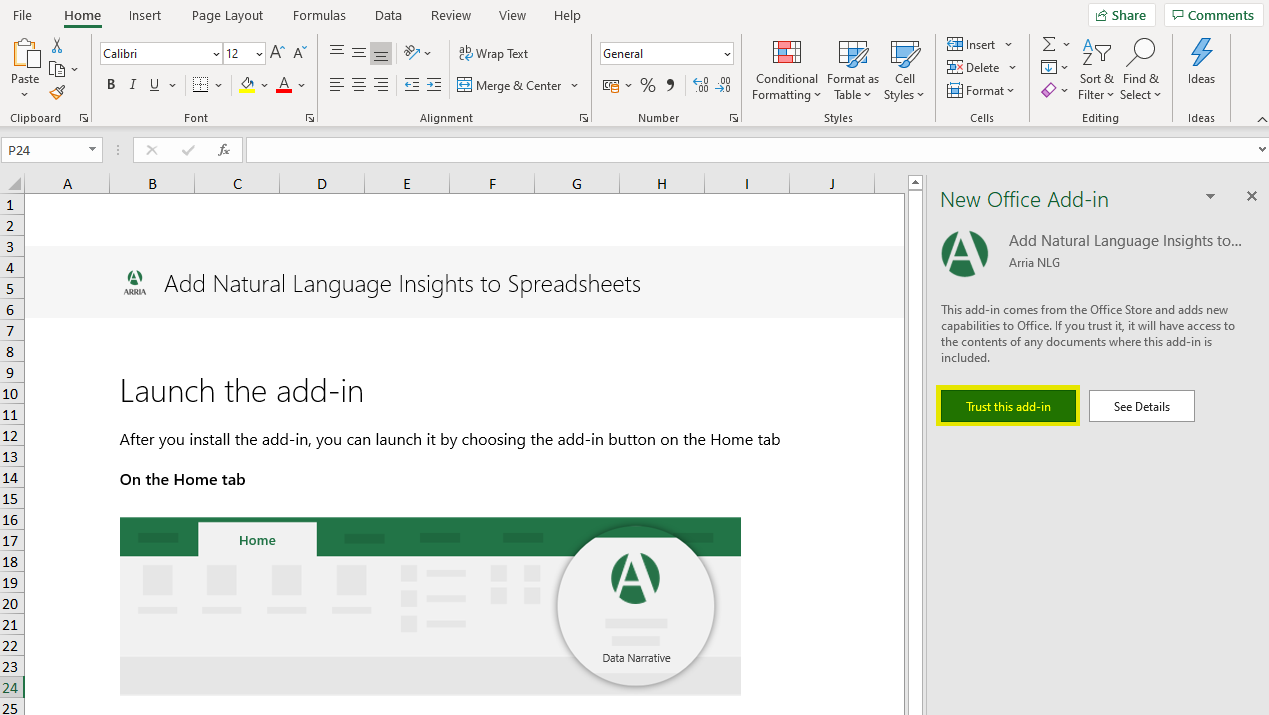
In Excel, in the New Office Add-in pane, click Trust this add-in.
The ARRIA NLG button now appears in your Excel ribbon.
Click the ARRIA NLG button to bring the add-in into any workbook and get started with Arria for Excel by signing into your Arria account.
Sideloaded installations
If you are evaluating the add-in and the Admin Managed and AppSource store installation options are unavailable, you can download the Arria for Excel manifest file and sideload it in Excel.
Once the add-in is sideloaded, you can bring it into any workbook by going to the Home tab and clicking Insert > Get Add-ins > Shared Folder.
 |
Note
This installation method is not suitable for production use cases.
Sideload Arria for Excel in Office for Windows
When sideloading Arria for Excel in Office for Windows, you must first place the manifest file in a shared folder — on your local machine or on a server — then specify the shared folder as a trusted catalog in Excel.
Set up a shared folder:
If you have Windows Administrator permissions on your machine, see Microsoft's documentation for instructions on how to set up a shared folder on a local machine. Otherwise, ask your systems administrator to set up a shared folder on a server on your network (e.g.
\\100.20.1.120\
ArriaManifest)
.
Specify the shared folder as a trusted catalog:
See Microsoft's documentation for instructions.
Sideload Arria for Excel in Office on the web
See Microsoft's documentation for instructions on how to sideload Arria for Excel in Office on the web.
Updating Arria for Excel
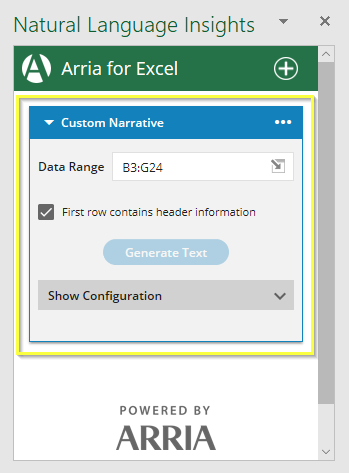
The add-in version is shown at the bottom of the Arria for Excel task pane:
 |
Admin Managed installations
Updates are rolled out automatically. If your add-in is not up to date, contact your systems administrator.
Note
A note for systems administrators
We strongly recommend installing with the I want to add an Add-in from the Office Store option in the Microsoft Office 365 admin center. See the Microsoft documentation for details.
AppSource store installations
Updates are rolled out automatically.
Sideloaded installations
First, uninstall the previous version of the manifest file, then install the latest version.
Uninstalling Arria for Excel
Admin Managed installations
Contact your systems administrator for help with uninstalling an Admin Managed installation of Arria for Excel.
AppSource store installations
If Arria for Excel was installed using one of the the AppSource store options, uninstall it as follows:
In the Excel Home tab, click Insert > Get Add-ins (Excel for Desktop) or Insert > Office Add-ins (Excel Online).
Excel for Desktop
Excel Online
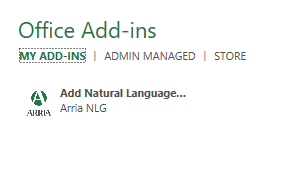
You see a window with one or more of the following tabs:
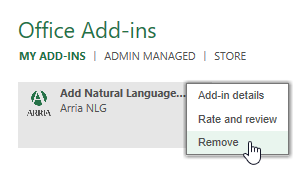
Click My Add-ins.
You see the Arria add-in.
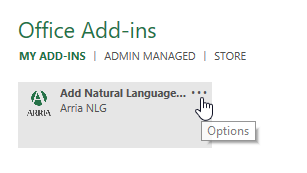
Click the ellipsis in the top-right corner, then click Remove in the options menu.
Sideloaded installations
See the relevant Microsoft documentation for instructions on how to uninstall the add-in:
