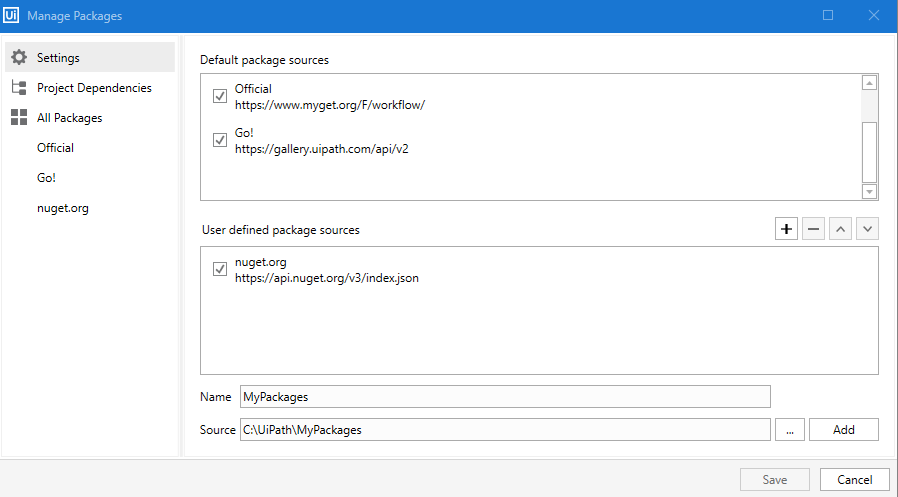
Installing the Arria Connect package
Download the Arria Connect custom activity package.
Copy the package to a local folder (e.g.
C:\UiPath\MyPackages).In UiPath Studio, go to Settings in the left navigation bar, then select Manage Sources and add a new user-defined package source.
In the Name field, below User defined package sources, type
Arria.In the Source field, click the ellipsis (...) to browse for the folder that you saved the Arria Connect package to and click Select Folder.
Click Add.
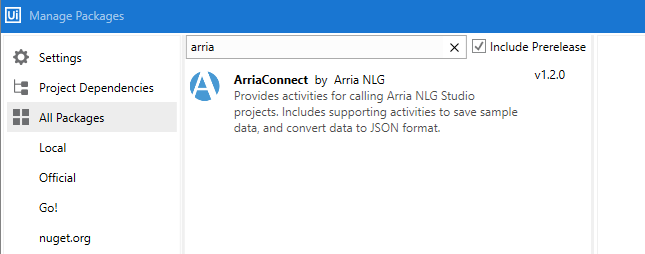
Click Start in the left navigation bar then, from the New Project menu, select Process.
Give the new project a name (e.g.
ConnectWithArria) and click Create.Click Open Main Workflow.
In the Design tab, click the Manage Packages icon.

Click All Packages, and select ArriaConnect.
Click Install, and then click Save.
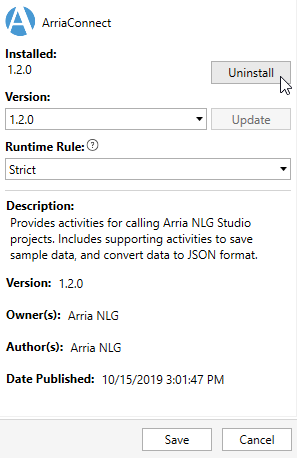
The Arria Connect package is added to your new project. In the Activities panel, under Available, you will see the Arria Connect custom activity in your list.

You'll come back to your UiPath Studio project to create your workflow later. First, you need to configure the NLG Studio project and download the sample data you'll use to generate your narrative.
